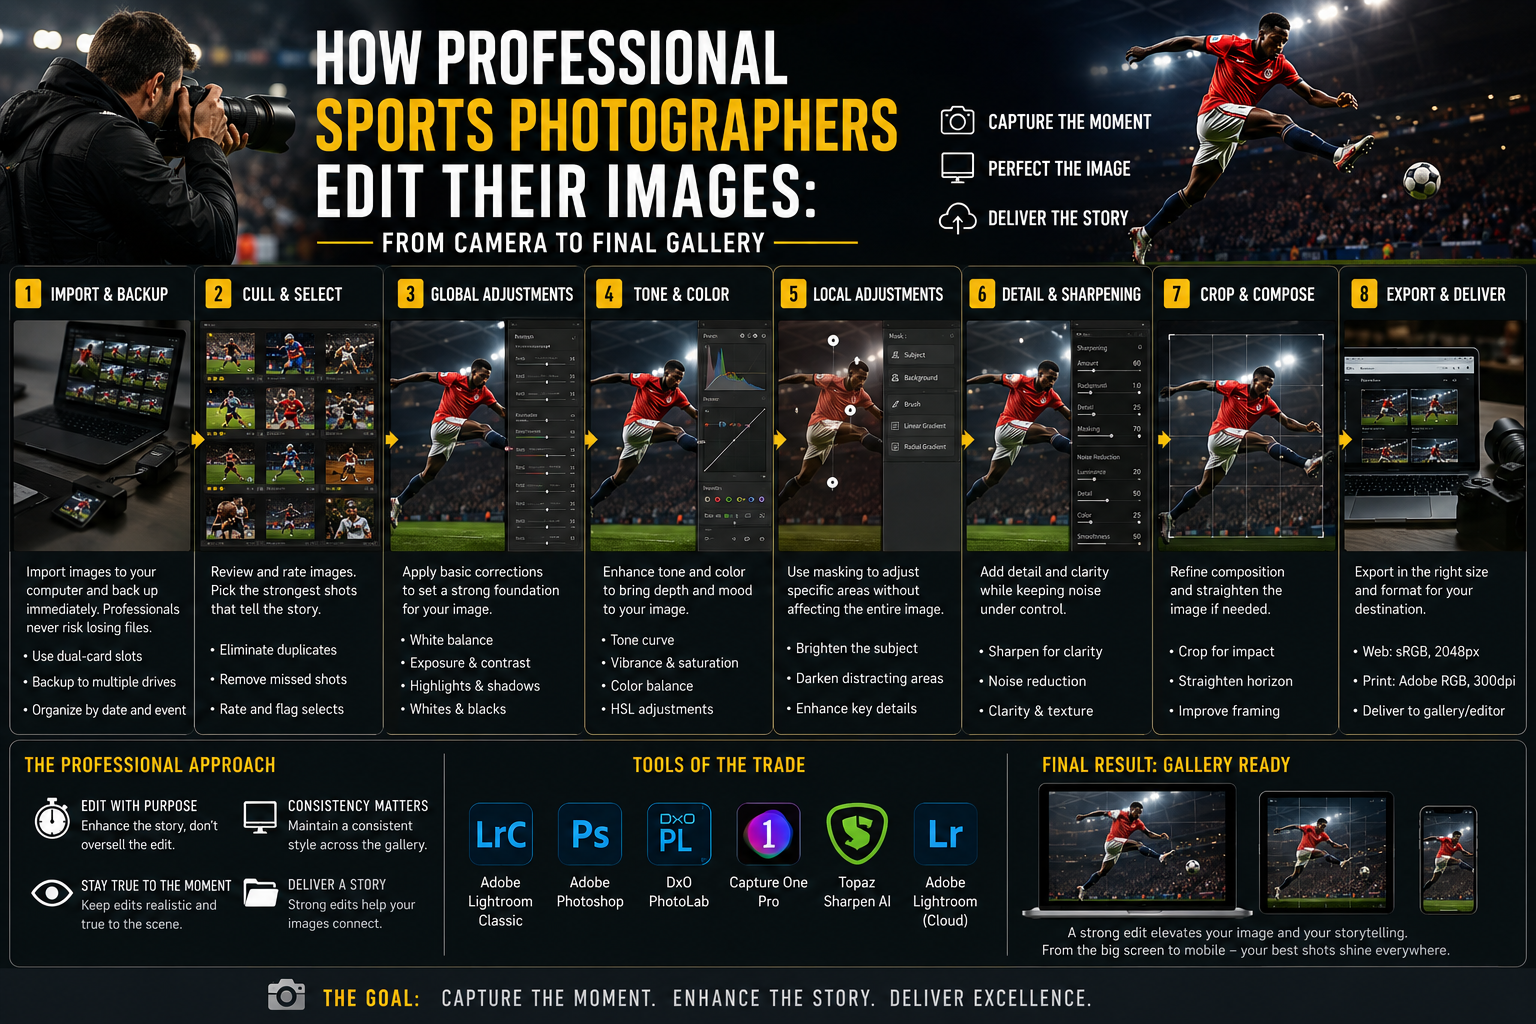
How Professional Sports Photographers Edit Their Images: From Camera to Final Gallery
By CWP Media
Capturing the perfect sports image doesn't end when you press the shutter. In many ways, that's just the beginning.
Professional sports photography isn't about dramatically changing an image—it's about enhancing what was already captured. A good edit preserves the authenticity of the moment while making the image look polished, consistent, and ready for print or digital delivery.
At CWP Media, our editing workflow is designed to deliver clean, vibrant, and true-to-life images while maintaining efficiency for thousands of photos from every event.
Here's a look behind the scenes at how professional sports photographers edit their images.
Step 1: Import and Back Up Everything
The first rule of professional photography is simple:
Never have only one copy of your images.
As soon as an event is over:
Copy every memory card to your computer.
Create an immediate backup on a second drive.
If possible, maintain an additional off-site or cloud backup.
Memory cards can fail. Hard drives can fail. Backups protect your work and your clients' memories.
Step 2: Cull the Images
A photographer may shoot several thousand images during a single event.
The first task is narrowing them down to the best ones.
During culling, remove:
Out-of-focus images
Closed eyes
Motion blur
Duplicate frames
Blocked subjects
Missed action
Keep only the strongest moments.
Quality always beats quantity.
Step 3: Organize Your Gallery
Professional photographers don't simply dump images into a folder.
Organize by:
Event
Date
Team
Sport
Quarter, inning, or period (if needed)
Consistent organization makes future searches and client delivery much easier.
Step 4: Correct Exposure
Even with modern cameras, exposure may need slight adjustments.
Typical corrections include:
Brightening underexposed images
Recovering highlight detail
Opening shadows without making the image look flat
Preserving natural contrast
The goal is a balanced image that reflects what you saw on the field.
Step 5: Adjust White Balance
Different lighting conditions create different color casts.
Examples include:
Orange stadium lights
Green gym lighting
Blue evening skies
Mixed indoor lighting
A proper white balance ensures uniforms, skin tones, and field colors appear natural.
Step 6: Fine-Tune Contrast
Contrast helps create depth and impact.
Professional edits often include subtle adjustments to:
Contrast
Blacks
Whites
Highlights
Shadows
Avoid overdoing it. Strong contrast should enhance the image, not overpower it.
Step 7: Improve Color Naturally
Sports photographs should feel vibrant without looking unrealistic.
Small adjustments to vibrance and saturation can make uniforms, fields, and skies pop while preserving natural skin tones.
The best compliment is when viewers don't notice the editing—they simply enjoy the photograph.
Step 8: Crop for Better Composition
Cropping can strengthen an image by removing distractions and emphasizing the subject.
When cropping:
Leave room in front of moving athletes.
Avoid cutting off hands, feet, or sports equipment.
Maintain consistent aspect ratios for galleries and prints.
Every crop should improve the story the image tells.
Step 9: Reduce Noise
Indoor gyms, stadiums, and evening games often require high ISO settings.
Noise reduction helps smooth grain while preserving important details such as:
Eyes
Jerseys
Numbers
Equipment
Textures
Apply noise reduction carefully—too much can make an image appear soft.
Step 10: Sharpen with Purpose
Sharpening should enhance important details, not create halos or artifacts.
Focus sharpening on:
Eyes
Faces
Uniform details
Ball textures
Equipment
Remember: a sharp subject draws the viewer's attention.
Step 11: Straighten the Horizon
Crooked sidelines, goalposts, or gym floors can distract from an otherwise excellent image.
Take a few seconds to straighten the frame before exporting.
It's a small adjustment that makes a big difference.
Step 12: Remove Minor Distractions
Basic cleanup may include removing:
Dust spots
Sensor debris
Small background distractions
Temporary objects that pull attention away from the athlete
The objective is to improve the image without altering the reality of the event.
Step 13: Keep Skin Tones Realistic
Athletes should look like themselves.
Avoid edits that make skin appear:
Too orange
Too red
Too pale
Overly smooth
Natural skin tones help maintain the authenticity of the moment.
Step 14: Maintain Consistency Across the Gallery
One hallmark of a professional gallery is consistency.
Every image should have a similar look and feel, including:
Exposure
Color balance
Contrast
Sharpness
Overall style
Consistency creates a polished experience for clients.
Step 15: Export for the Intended Use
Different uses require different export settings.
Social Media
Smaller file sizes
Optimized for fast loading
Sharpened for screen viewing
Prints
Full-resolution files
Maximum image quality
Appropriate color space for printing
Websites
Compressed images that balance quality with fast page loading
Choosing the right export settings ensures your images look their best wherever they're viewed.
Common Editing Mistakes to Avoid
Even experienced photographers can fall into these traps:
Oversaturating colors
Excessive HDR effects
Over-sharpening
Heavy-handed noise reduction
Clipping highlights or shadows
Cropping too aggressively
Applying the same preset without adjustments
Editing should enhance the image—not become the focus.
Efficiency Matters
When covering tournaments, championships, or multi-day events, photographers often need to process thousands of images quickly.
An efficient workflow includes:
Keywording and metadata
Batch editing similar images
Keyboard shortcuts
Rating and color labels
Organized folder structures
Regular backups
The faster you work without sacrificing quality, the sooner clients receive their images.
The CWP Media Philosophy
At CWP Media, we believe great editing begins with great photography.
Our goal is never to "fix" bad images. Instead, we capture the moment correctly in-camera and use editing to refine the final result.
Every adjustment is made with one purpose in mind: preserving the emotion, excitement, and authenticity of the event.
Whether it's a youth soccer match, a state championship football game, or a collegiate sporting event, every athlete deserves images that tell their story with honesty and professionalism.
Final Thoughts
Editing is one of the most important skills a sports photographer can develop. It bridges the gap between a good photograph and a memorable one.
The best editing is often invisible. It quietly improves exposure, color, sharpness, and composition while allowing the athlete's effort and emotion to remain the center of attention.
At CWP Media, we're committed to delivering galleries that are technically polished, visually consistent, and built to preserve memories for years to come.